

On this tutorial I am going to present you learn how to launch a totally sandboxed macOS software on system startup written in Swift.
WARN: Replace: you need to merely add the LaunchAtLogin library to your challenge. It’ll care for every part and it has another cool utility options.
Challenge setup
Let’s begin this tutorial by creating a brand new Xcode challenge with a macOS app template. Identify it for instance MainApplication, use storyboards and naturally choose Swift because the default language, we don’t want checks for this challenge in any respect.
Now that we’ve the primary software goal, there’s this good little perform accessible referred to as SMLoginItemSetEnabled. With that perform you’ll be able to register an software bundle identifier to auto begin when the consumer logs in, however you can’t register your personal app identifier. Sounds loopy, huh? 😜
You’ll be able to register a bundle identifier embedded into your essential software to get auto-launched by the system. To do that you’ll have to create a brand new launcher software which might be launched later by your essential software.
You additionally must code signal your software together with your Developer ID, in any other case it gained’t begin after you log in to macOS. Sandboxing is an important a part of the method, so just remember to observe each instruction fastidiously.
Targets & configurations
Create a brand new goal inside your present challenge. Identify this new goal for instance LauncherApplication. Allow sandbox and code signing for each targets (essential and launcher apps) underneath the Signing & Capabilities tab. For the LauncherApplication goal within the construct settings set skip set up to sure.

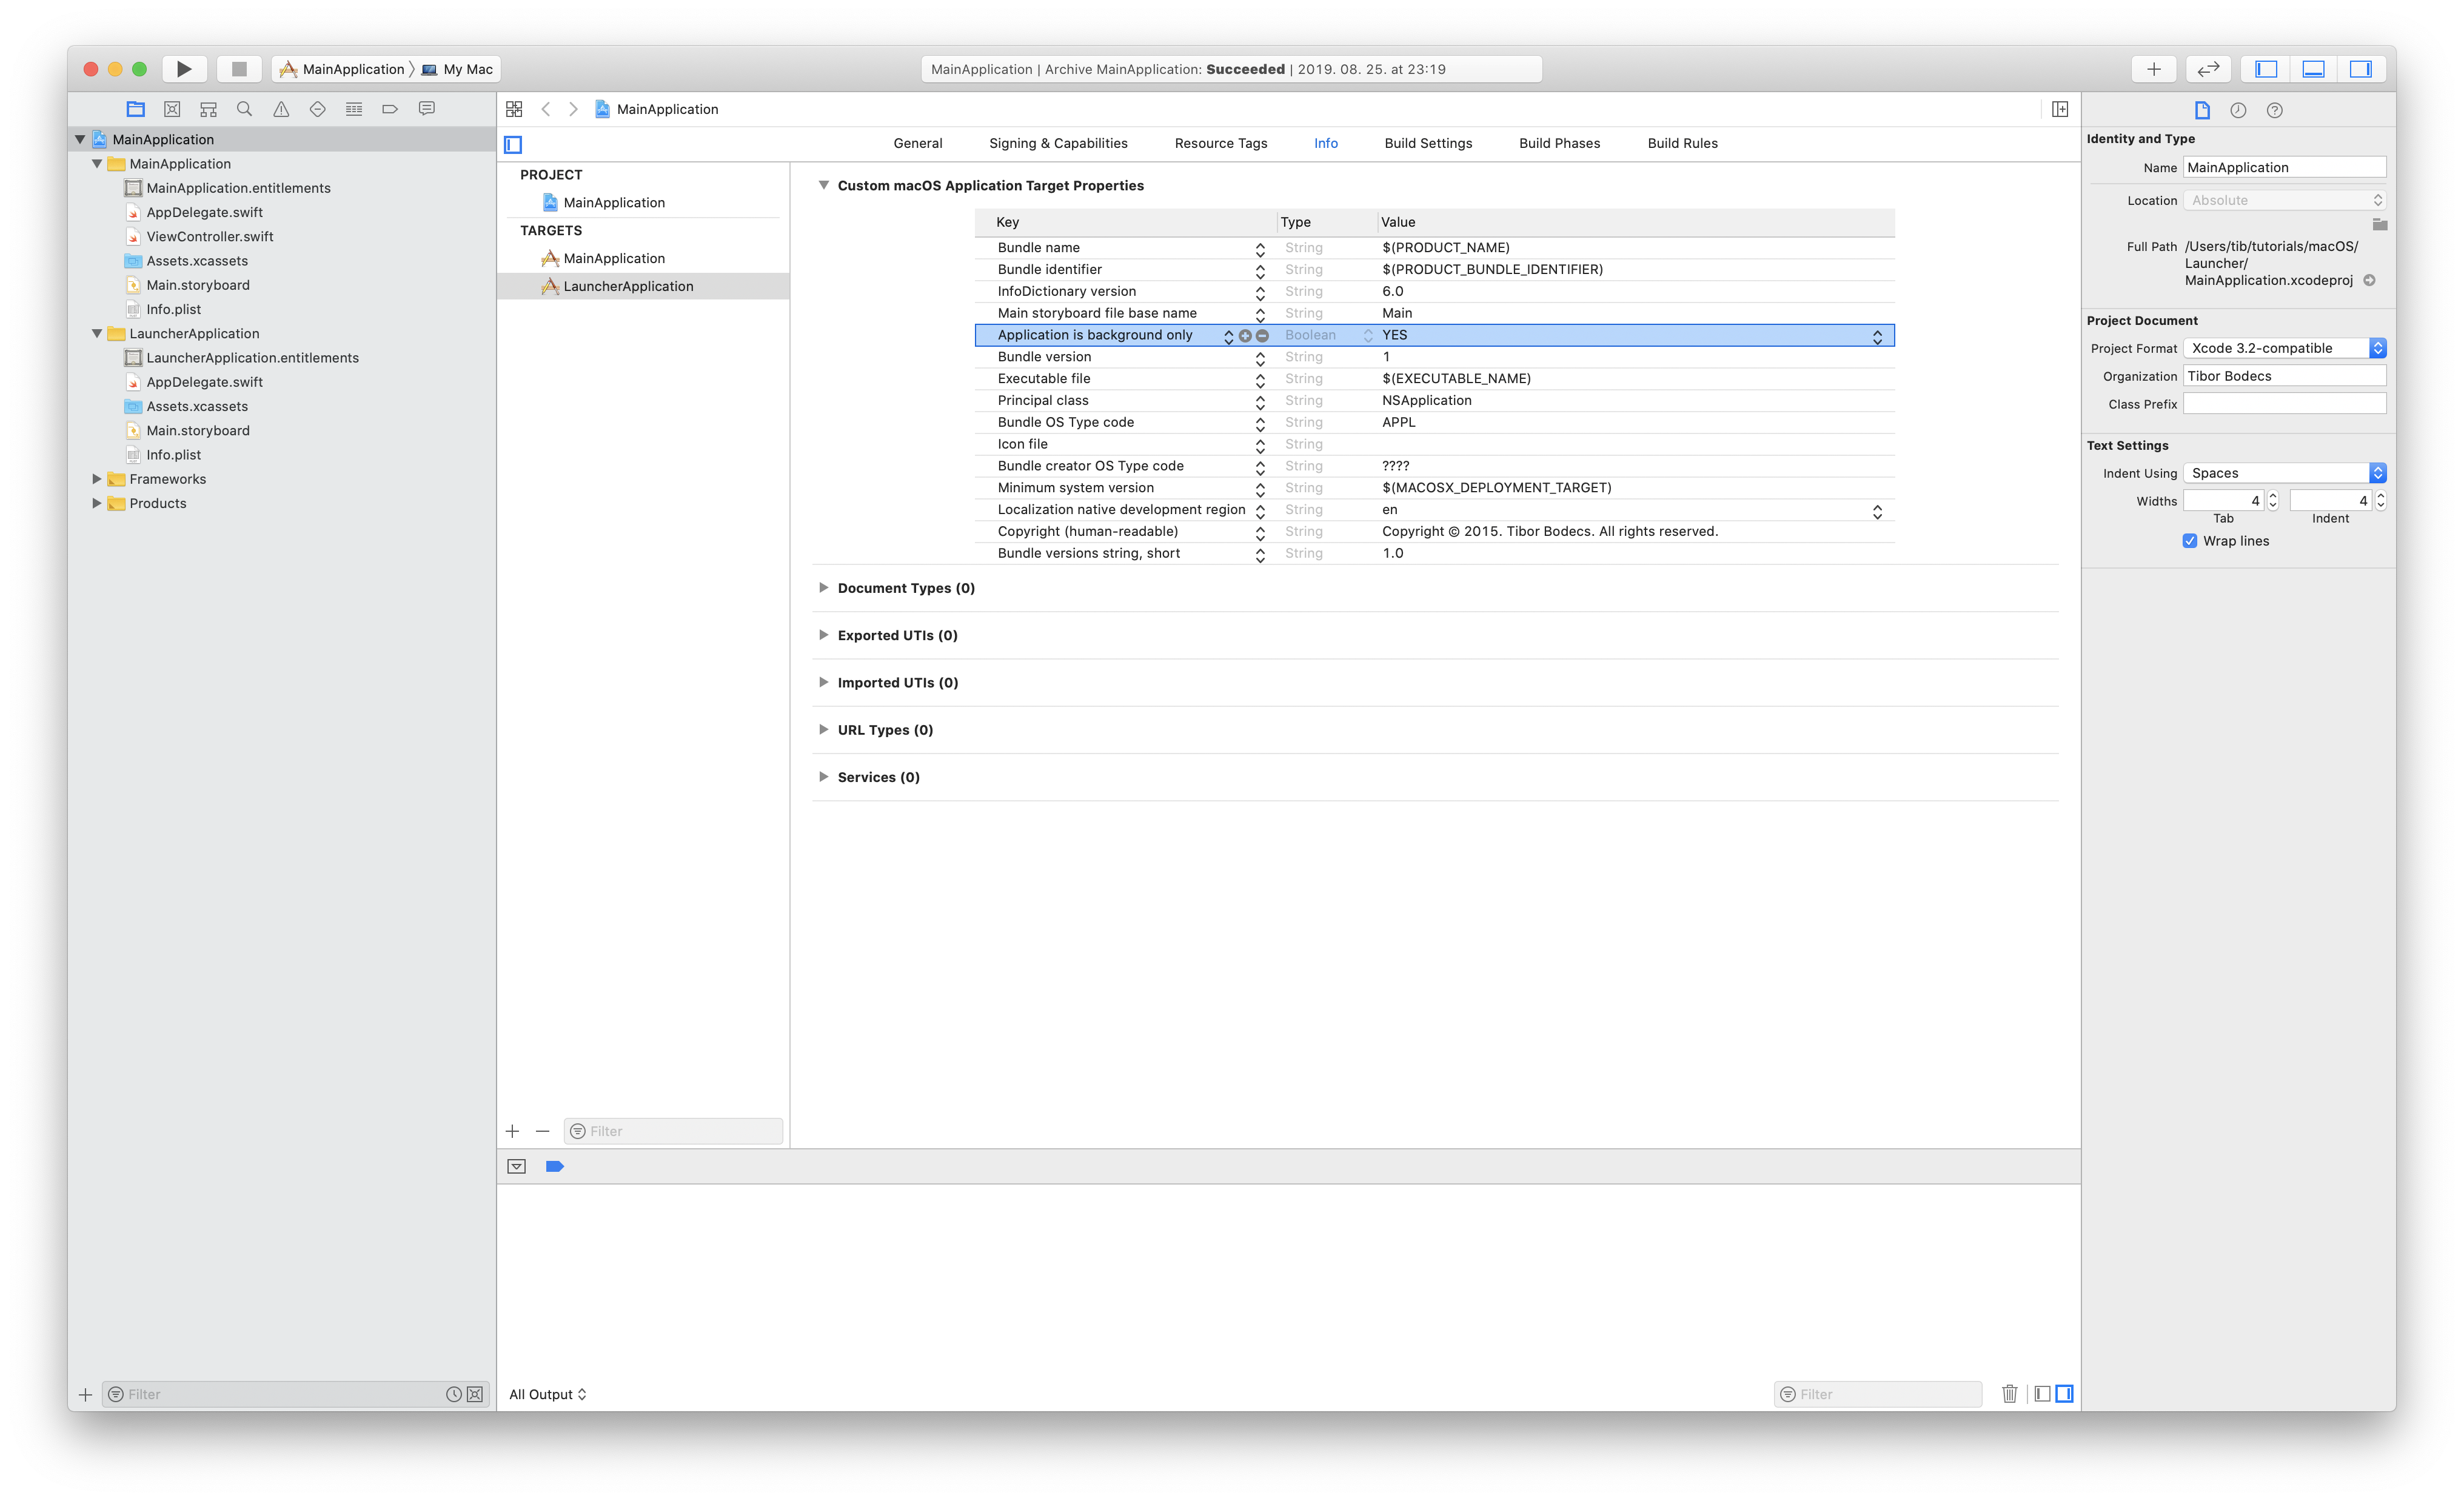
For the launcher app add a brand new entry to the Information.plist file: Software is background solely with the worth: sure. This can set your software as a background app, we don’t actually need consumer interface for a launcher device, proper?
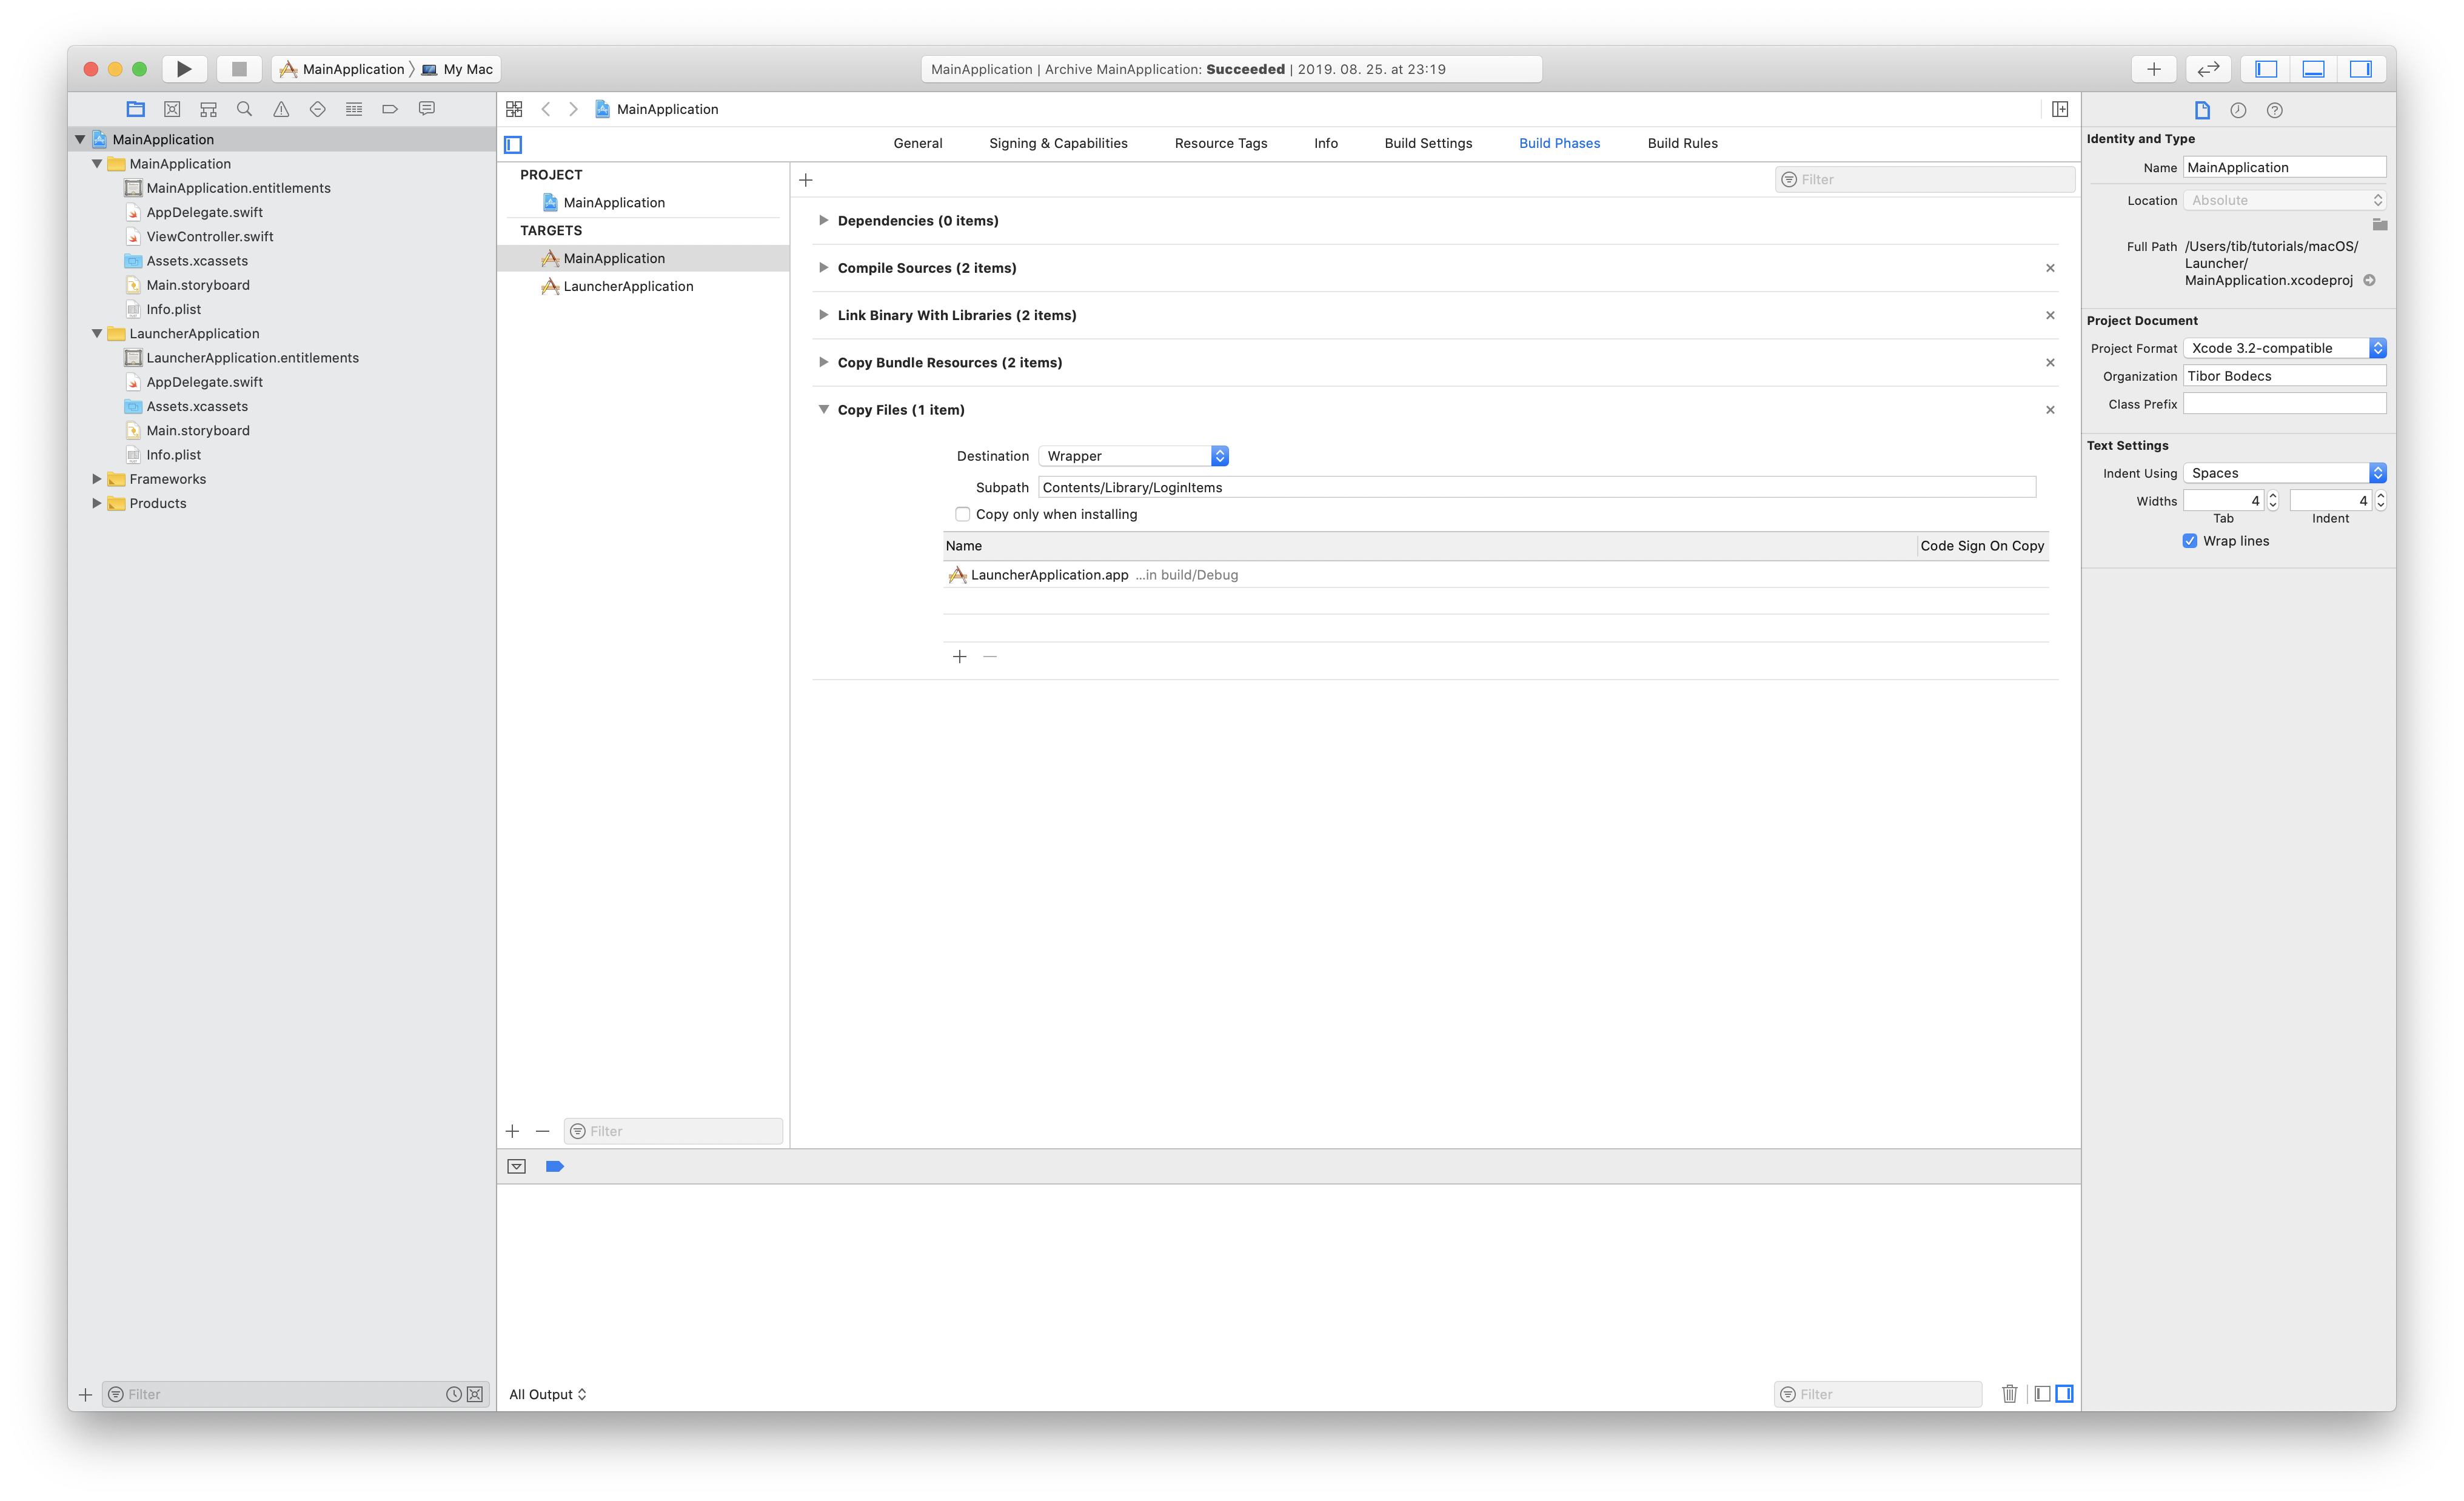
Add a brand new copy file construct part to your essential software goal to repeat your launcher software into the bundle. The vacation spot ought to be wrapper and the subpath ought to be Contents/Library/LoginItems.
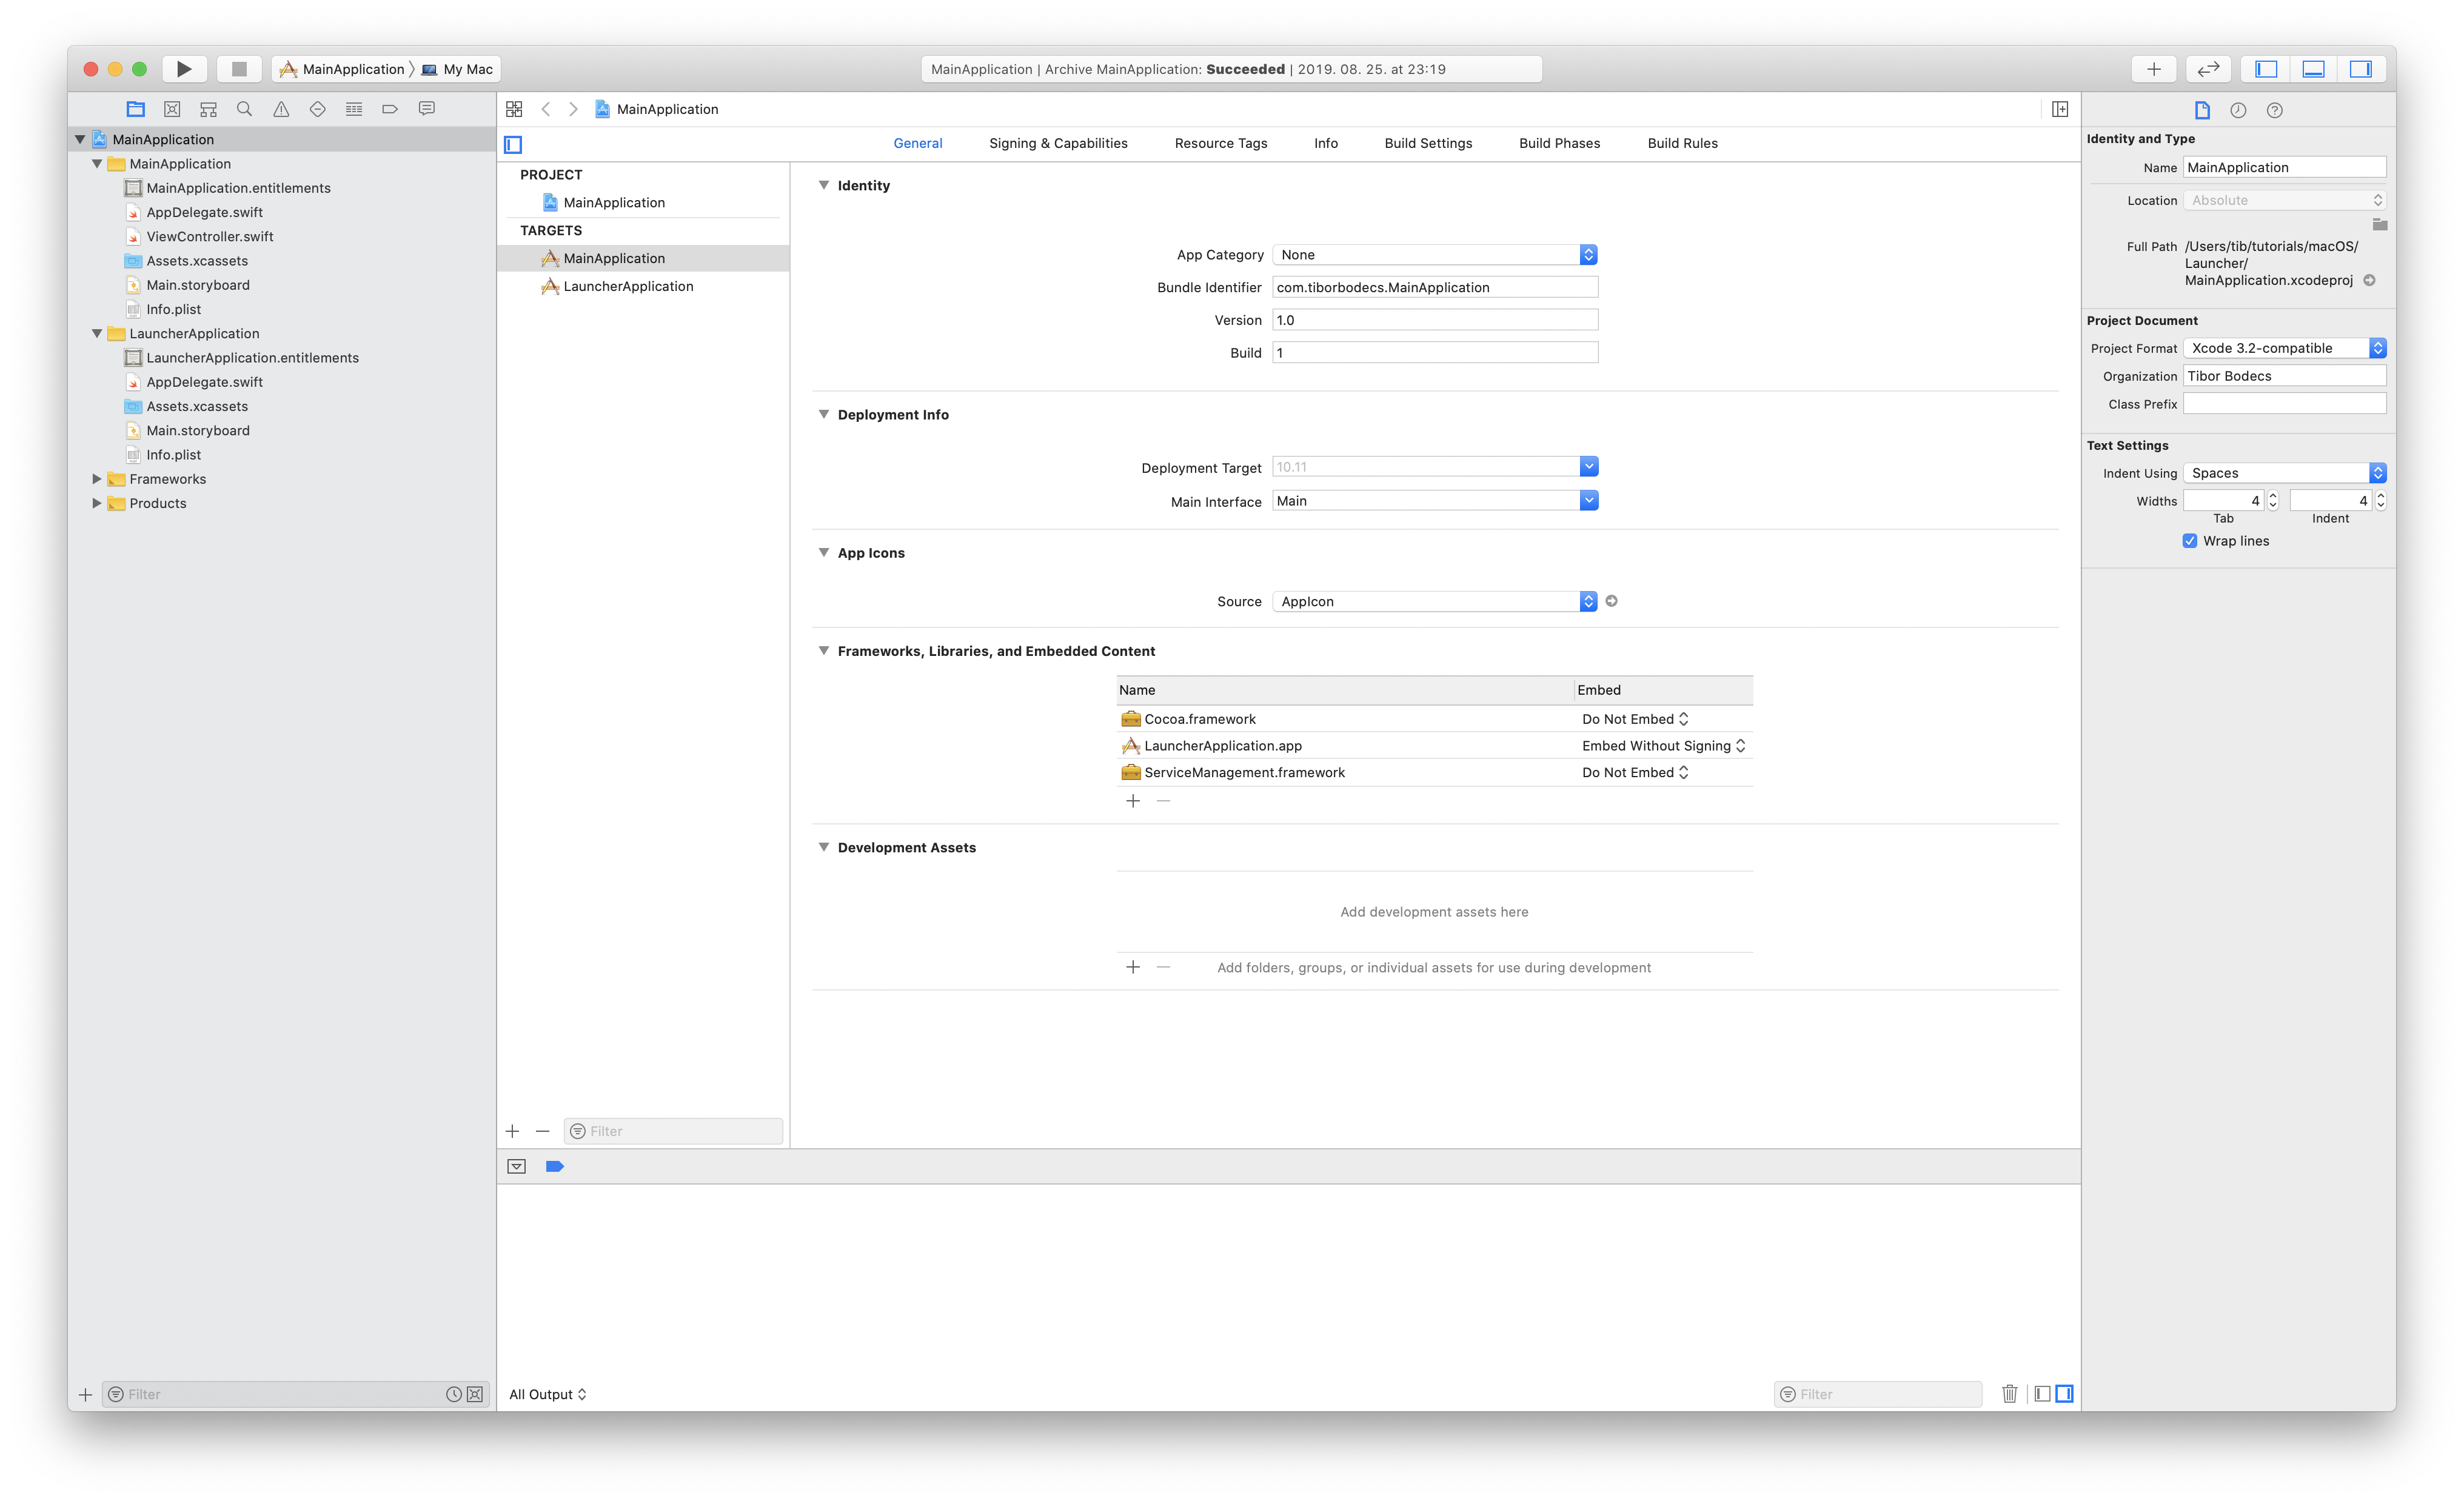
Hyperlink the ServiceManagement.framework to your essential software and double test that the launcher app is embedded into your essential software.
From the LauncherApplication‘s storyboard file delete your window and your view controller, additionally you’ll be able to take away the ViewController.swift file from this goal. It is a background app in spite of everything, so we don’t want these silly issues to put round.
Creating the launcher programmatically
Someplace in your essential software it’s important to register your launcher software’s identifier. When your essential software begins it’s important to kill the launcher software if it’s nonetheless working. You are able to do this by sending a notification to that particular app with the NSDistributedNotificationCenter class.
import Cocoa
import ServiceManagement

extension Notification.Identify {
    static let killLauncher = Notification.Identify("killLauncher")
}

@NSApplicationMain
class AppDelegate: NSObject {}


extension AppDelegate: NSApplicationDelegate {

    func applicationDidFinishLaunching(_ aNotification: Notification) {

        let launcherAppId = "com.tiborbodecs.LauncherApplication"
        let runningApps = NSWorkspace.shared.runningApplications
        let isRunning = !runningApps.filter {
            $0.bundleIdentifier == launcherAppId
        }.isEmpty

        SMLoginItemSetEnabled(launcherAppId as CFString, true)

        if isRunning {
            DistributedNotificationCenter.default().put up(
                title: .killLauncher,
                object: Bundle.essential.bundleIdentifier!
            )
        }
    }
}
Within the launcher software it’s important to begin your essential software if it’s not working already. That’s it. You must also subscribe for the notifications from the primary app to terminate if the launcher is just not wanted anymore.
import Cocoa

extension Notification.Identify {
    static let killLauncher = Notification.Identify("killLauncher")
}

@NSApplicationMain
class AppDelegate: NSObject {

    @objc func terminate() {
        NSApp.terminate(nil)
    }
}

extension AppDelegate: NSApplicationDelegate {

    func applicationDidFinishLaunching(_ aNotification: Notification) {

        let mainAppIdentifier = "com.tiborbodecs.MainApplication"
        let runningApps = NSWorkspace.shared.runningApplications
        let isRunning = !runningApps.filter {
            $0.bundleIdentifier == mainAppIdentifier
        }.isEmpty

        if !isRunning {
            DistributedNotificationCenter.default().addObserver(
                self,
                selector: #selector(self.terminate),
                title: .killLauncher,
                object: mainAppIdentifier
            )

            let path = Bundle.essential.bundlePath as NSString
            var elements = path.pathComponents
            elements.removeLast()
            elements.removeLast()
            elements.removeLast()
            elements.append("MacOS")
            elements.append("MainApplication") //essential app title

            let newPath = NSString.path(withComponents: elements)

            NSWorkspace.shared.launchApplication(newPath)
        }
        else {
            self.terminate()
        }
    }
}
That’s it, we’re able to launch. Export your essential software and right here is a very powerful factor: code signal it together with your Developer ID. Begin it, shut it, log off and again into the system. Hopefully your essential software might be working once more.